
Halloween is next weekend.. can you believe it? It's slowly creeping up on us. This is my favorite time of year, I love dressing up and everything about Halloween.
What's better than a Zombie Makeup Tutorial? A budget friendly Zombie Makeup Tutorial! Aside from the contacts this entire look can pretty much be accomplished with makeup you have at home. If you aren't much of a makeup wearer, I'm sure you know someone who would lend you items you don't own. What made this look so pricey was the zombie contact lenses. However, this makeup tutorial is just as good without contacts. The only items you will probably need to purchase are thick blood (~$4.99) and wax (~$4.99).
You will need the following items:
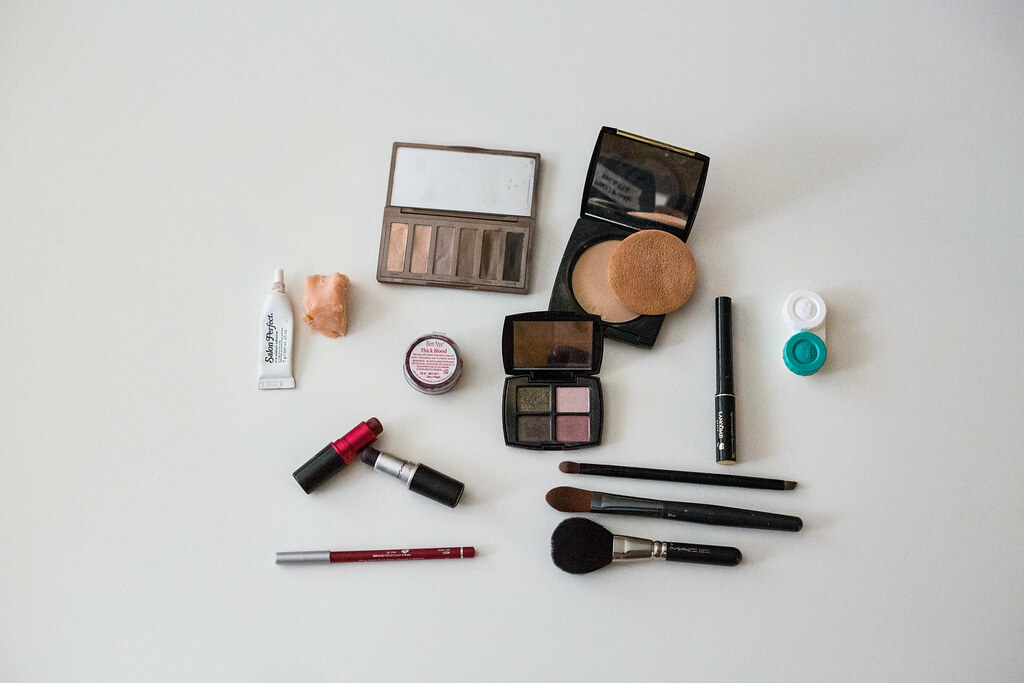
- Powder or Shine Control Powder (if you have oily skin)
- Dark Purple Lipstick
- Red Lipstick
- Red Eyeliner or Lip Liner
- Light, Medium, and Dark Eyeshadow
- Small, Medium, and Large Brush for contouring
- Wax
- Eyelash Glue or sticky glue of some sort
- Fake Blood
- Liquid Foundation for your lips (optional can use powder)
- Zombie Contacts (optional)

Step 1: Start with a clean face. Apply contacts if planning on wearing them. This part was very tricky for me hence why I didn't include a photo. I highly recommend using some sort of powder or shine control powder if you have oily skin or are oily in your t-zone. This will help the lipstick and eyeshadow stay on longer and apply easier.
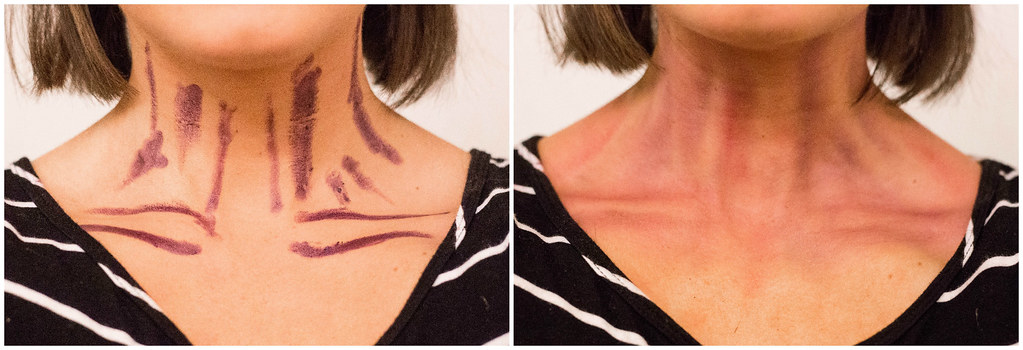
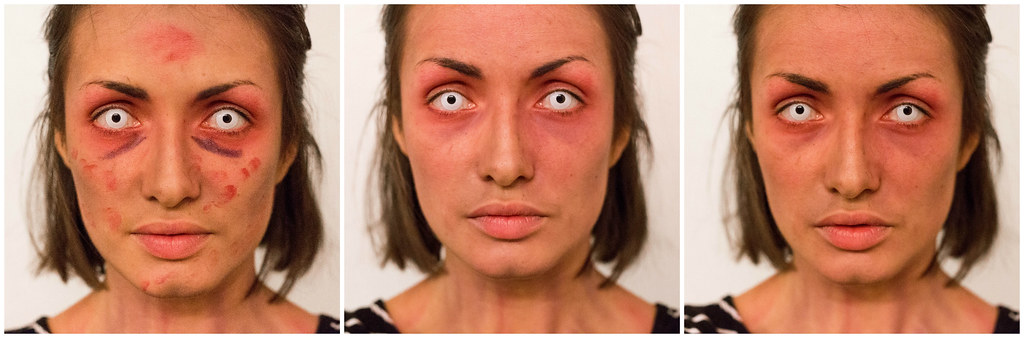
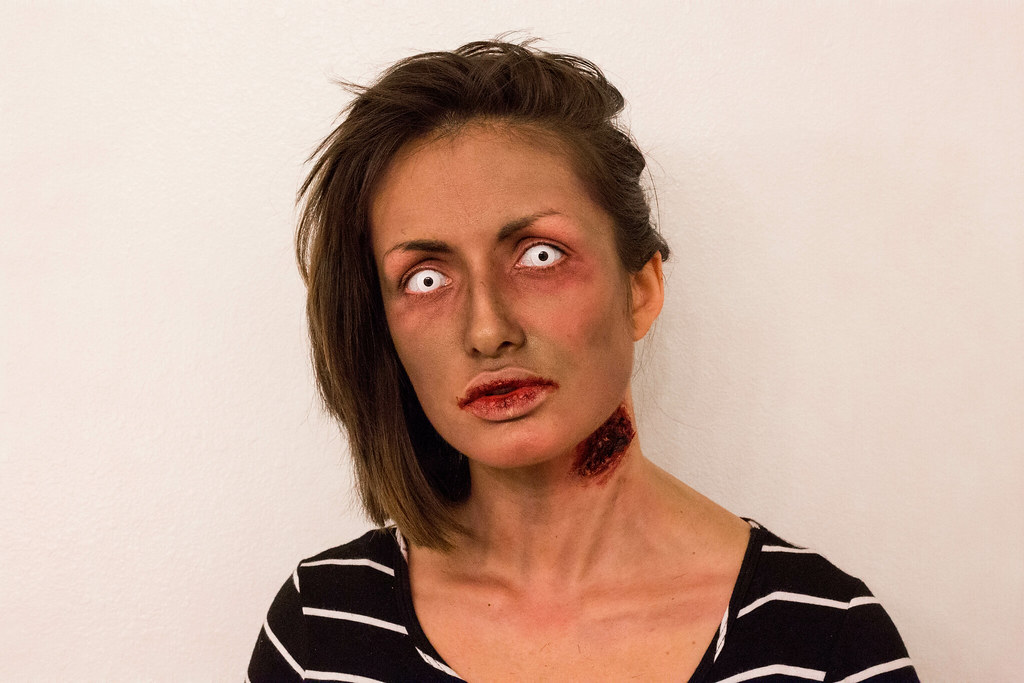
Step 2: Apply your dark purple lipstick in streaks along your neck and collar bones to create shadows and depth. Photo 2 was taken after I had applied my dark red lipstick in some areas and medium brown eye shadow for easier contouring. The key to this step is BLEND BLEND BLEND.
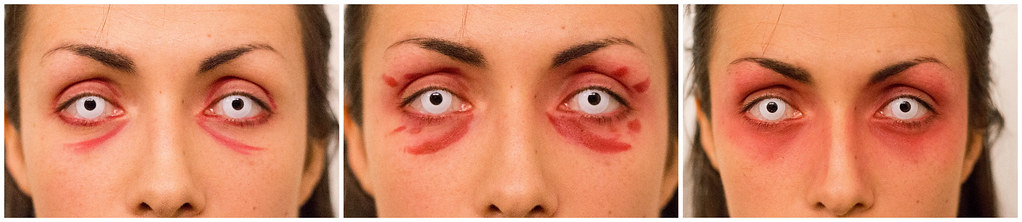

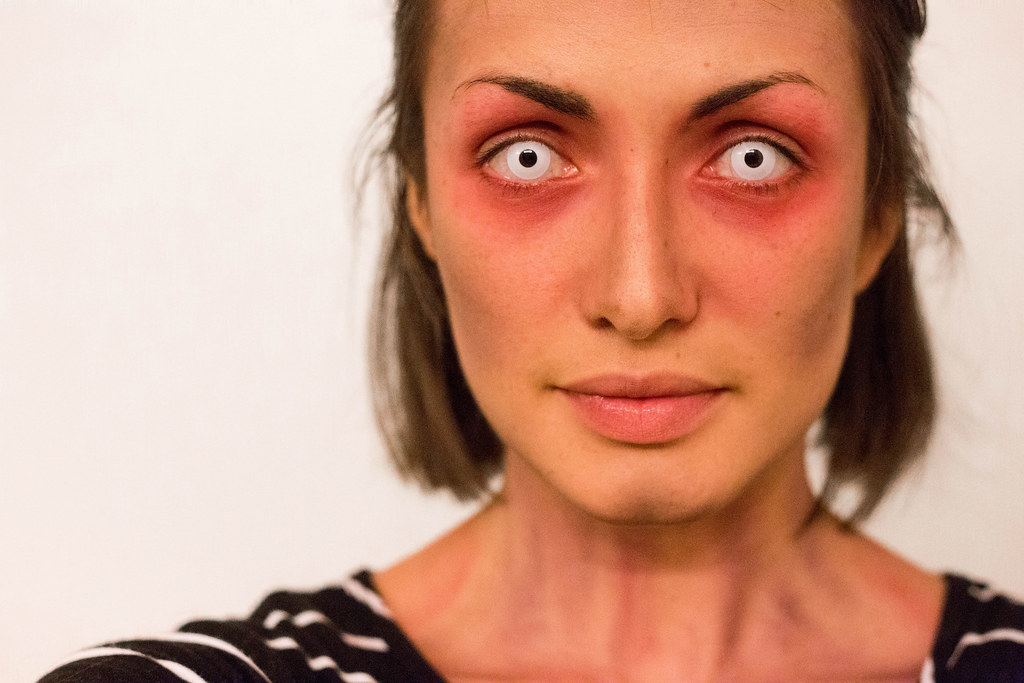
Step 3: Create irritated eyes by applying red eyeliner or lip liner around the waterline of your eyeball. You also want to embrace and bring out the bags under your eyes and make your eyes look more hollow. To do this simply line and blend with your finger. Should look something like the bottom photo when finished.
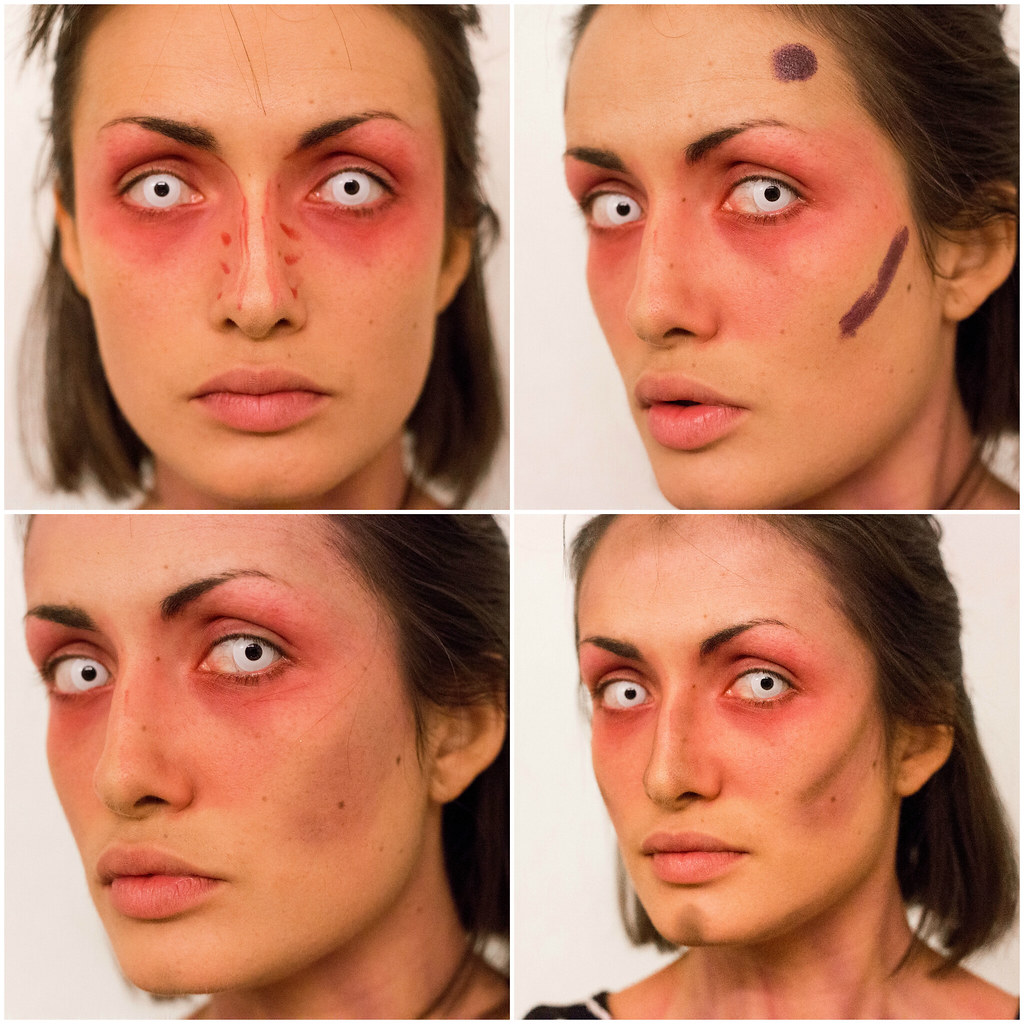
Step 4: Contour your face and cheek bones, zombie style. Take your red lipstick and contour your nose (see photo 1 & 2 for reference). Next draw two circles on your temples and 2 lines right under your cheek bones. Blend with your finger and do touch ups/add more color with your medium brown eye shadow. Also use your medium brown eye shadow right under your jaw bone and on your chin. Should look somewhat like the bottom photo when finished.

Step 6: Take your dark brown eyeshadow and circle around your eyes and sides of nose. This just makes your eyes look more sunken in and scary.
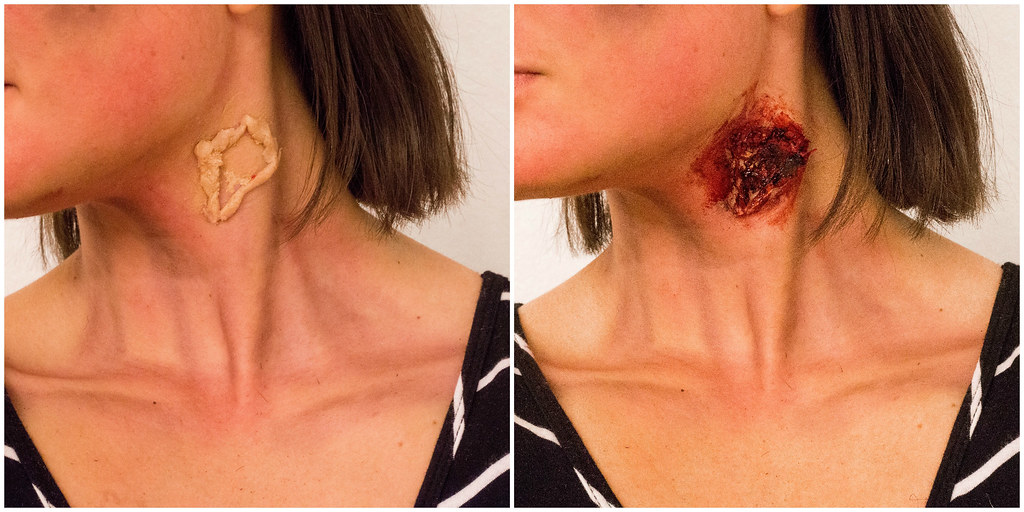
Step 7: Every zombie needs to have a flesh wound. I wanted to go the budget friendly route and make my own. If you don't feel like getting crafty, I know they make some that you just stick and apply at pretty much any Halloween store. What I did to create mine was buy this putty I don't even know what it's called and stuck it on with eyelash glue since I know that stuff is durable. I ended up buying some glue at the Halloween store that sucked.. so eyelash glue is highly recommended. After you create your wound fill it with fake blood! I added bits of liquid eyeliner to give it that scarred up look and just played around with it until I liked it.
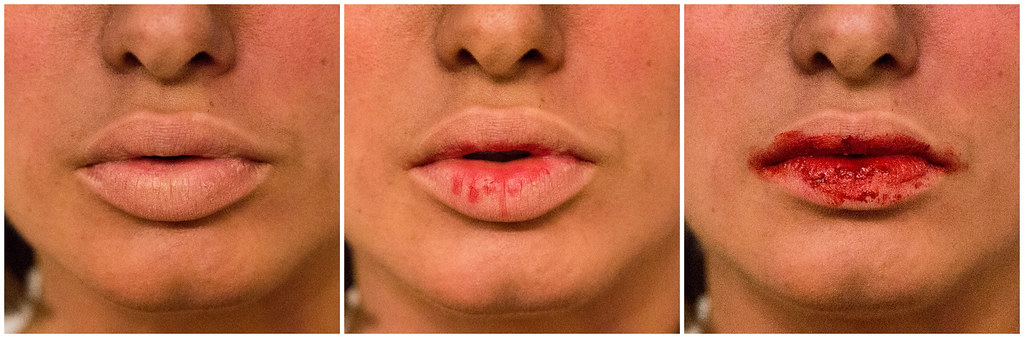
Step 8: Take a mossy green eyeshadow and cover the rest of your face to give you an unnatural skin tone. Finish off your makeup with bloody lips. First I took liquid foundation and covered my lips. Next I used my red eyeliner and drew along the inside of my mouth. Finished off my lips with fake blood.
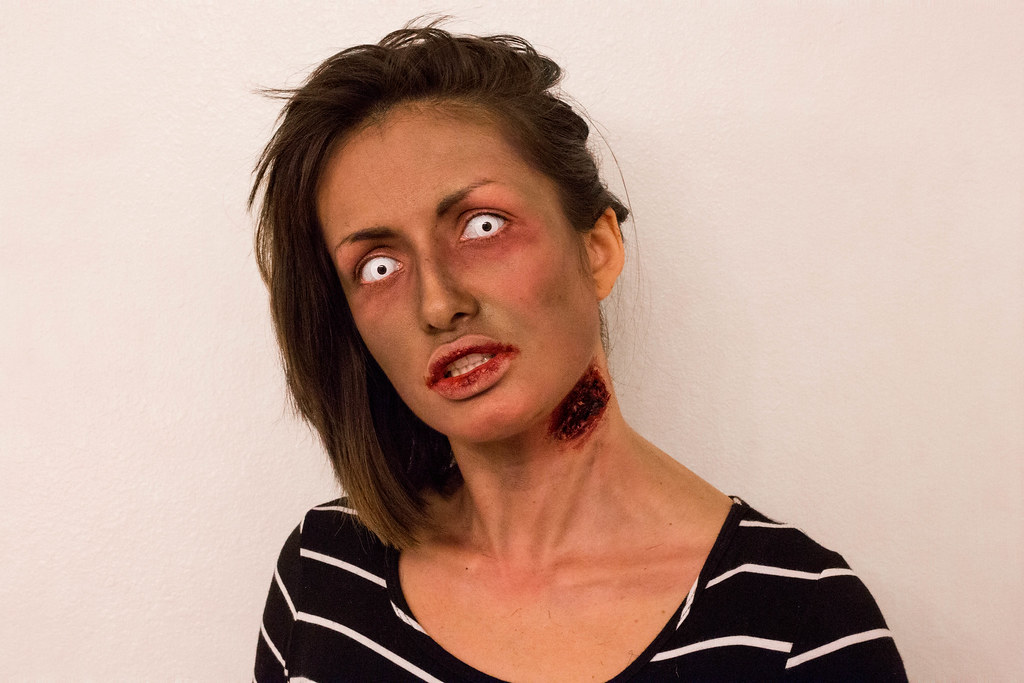
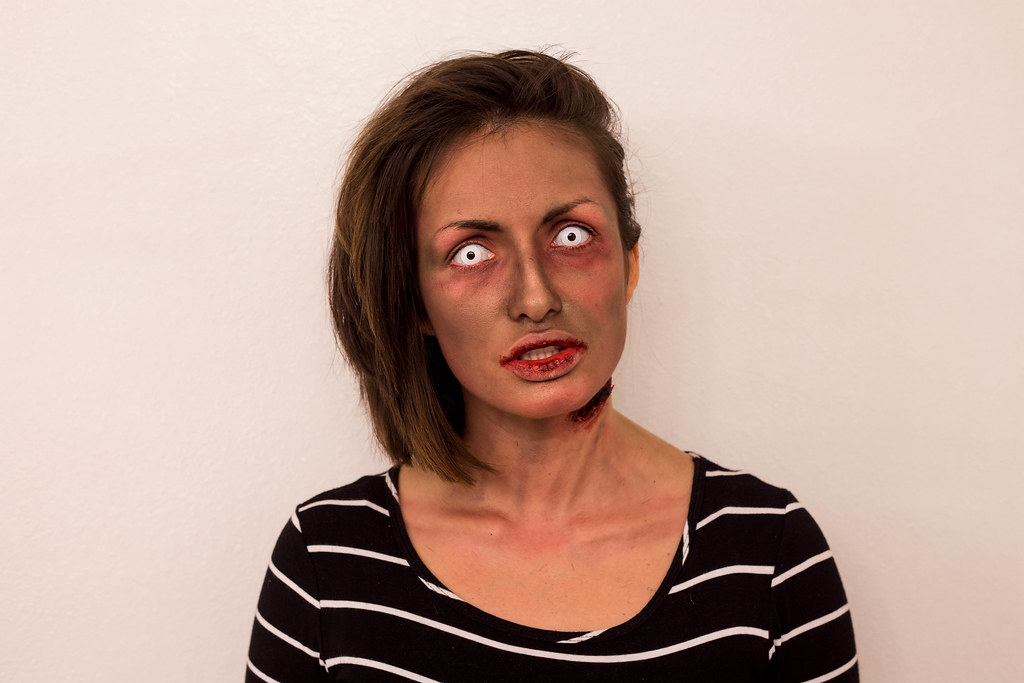
TA-DA! Zombie a la Cecilia. I know it's hard to go based off of pictures and text alone so I created a little video of me doing my makeup. Please be easy on me guys it's my first one and everything was going wrong last night. I also don't look too happy towards the last 2/3 of movie since I felt like my makeup wasn't going to turn out and my boys were being noisy on the other side of the door so I couldn't narrate or explain what I was doing.
Anyway, for those of you who are interested in giving it a watch here it is:
After you have hit up all the cool trick-or-treat spots with your kids I'm sure you will want to remove all this makeup. Well, that's where Neutrogena Makeup Remover Cleansing Towelettes come into play. These amazing towelettes do all the work for you. I was challenged by Neutrogena to "un-Halloween" at the end of my tutorial using just one wipe! These gentle towelettes remove all dirt, oil, makeup (even zombie wounds), and leave your face feeling super fresh and clean.
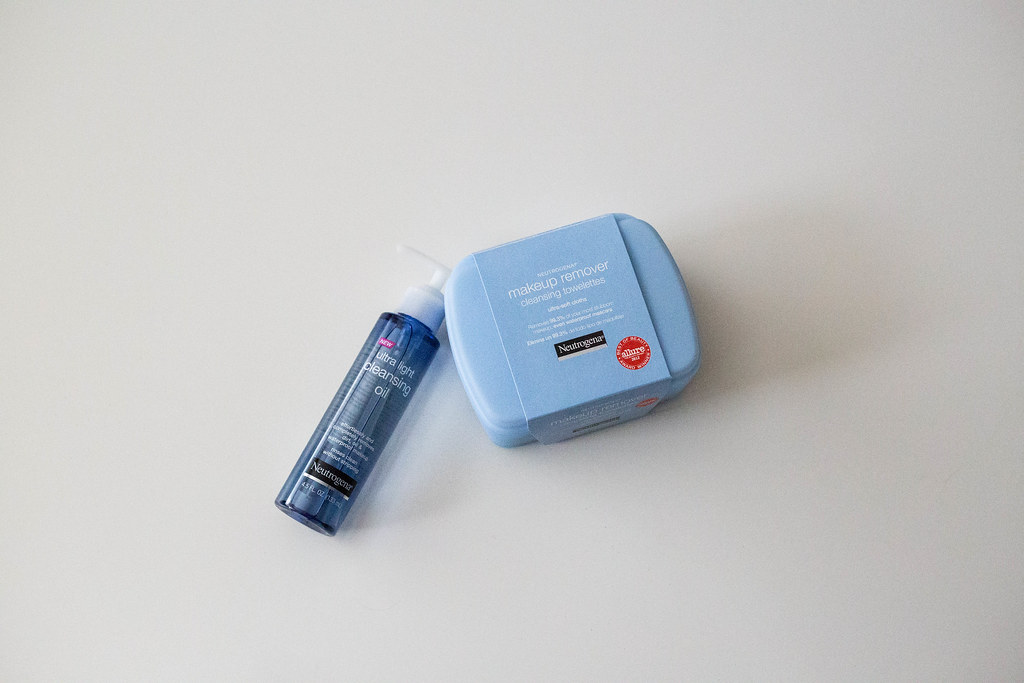
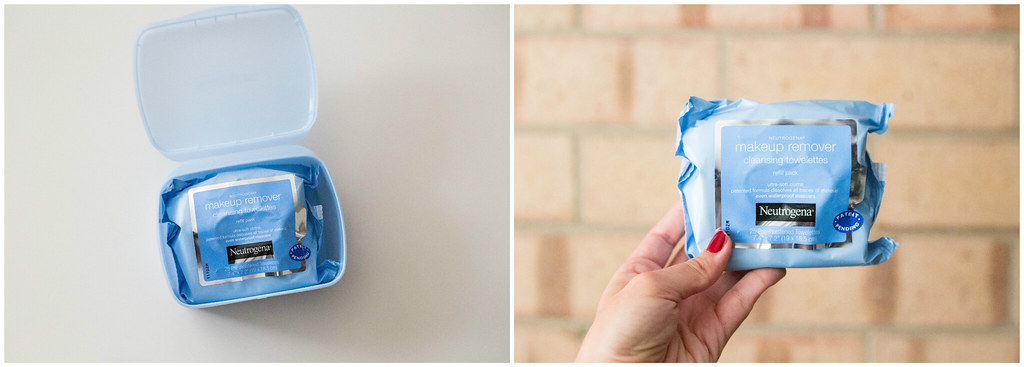
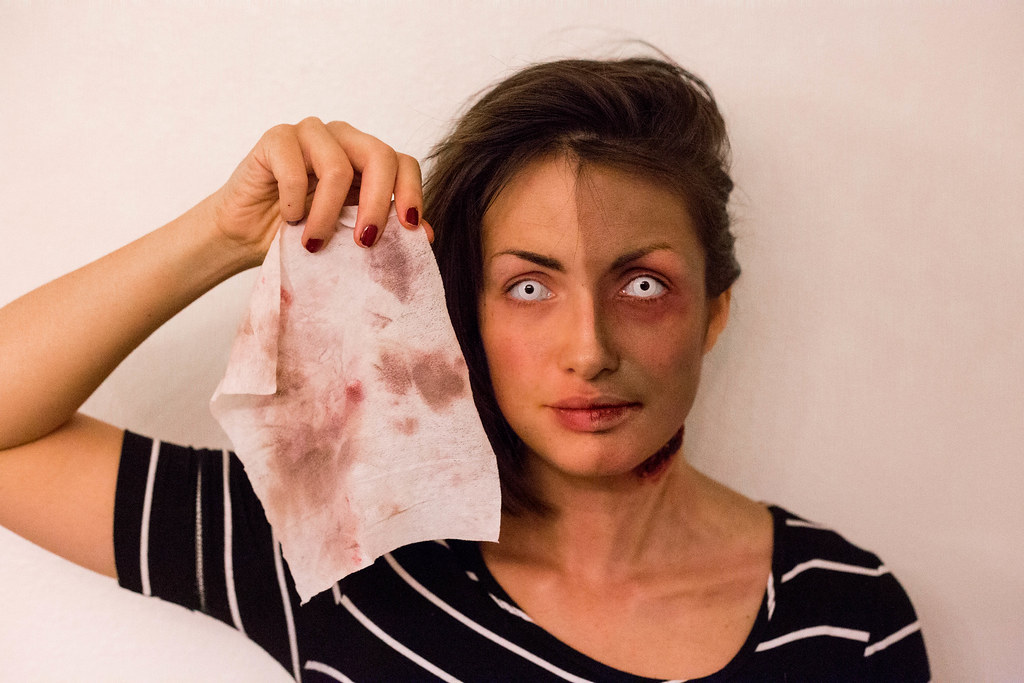
I didn't need to rinse my face afterwards or use any other product. I also didn't have any problem removing the makeup around my eye which I was worried about since I was wearing contacts. Here's a photo of half my makeup off and still lots of clean towelette to spare for other half. If you prefer a cleansing oil, Neutrogena Ultra-Light Cleansing Oil is one of my favorites.
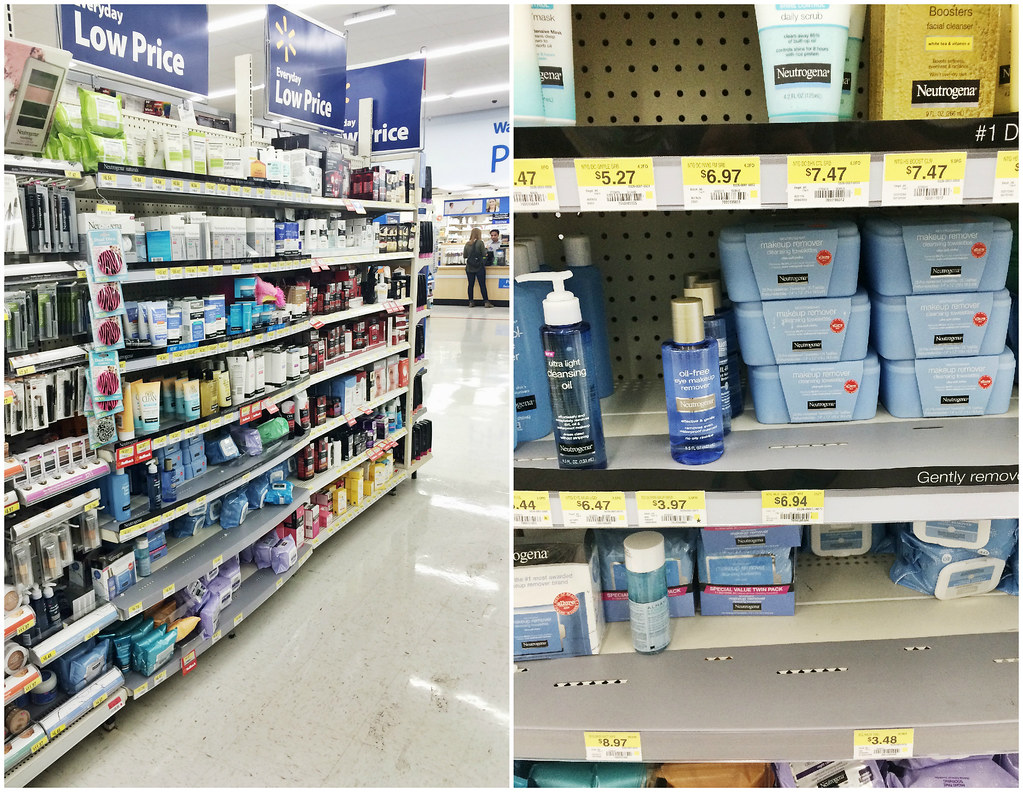
I found both the Neutrogena Makeup Remover Cleansing Towelettes and Neutrogena Ultra-Light Cleansing Oil in the beauty isle at our local Walmart. Super easy to find and affordable! You can count on Walmart to have your back when it comes to makeup remover this year.
What are you going to be for Halloween?


That is crazy awesome!
ReplyDeleteThis is so great, Cecilia! You nailed this post!
ReplyDeleteWhat an incredible transformation! I'm watching The Walking Dead right now and you could totally fit right in with this look! #client
ReplyDeleteThis is so good, it's freaking me out!!!
ReplyDeletehttp://www.ourlifeisbeautiful.com/